Conservation Landscaping: What is it and why
/
Our front yard is a complete blank slate and I’ve been doing a lot of reading and researching to learn more about conservation landscaping to determine if it’s right for us. There’s a ton of information out there, and I’m sure we won’t get it all right the first time, but I’m excited to take the first step and share what I’m learning along the way.
What Is A Conservation Landscape?
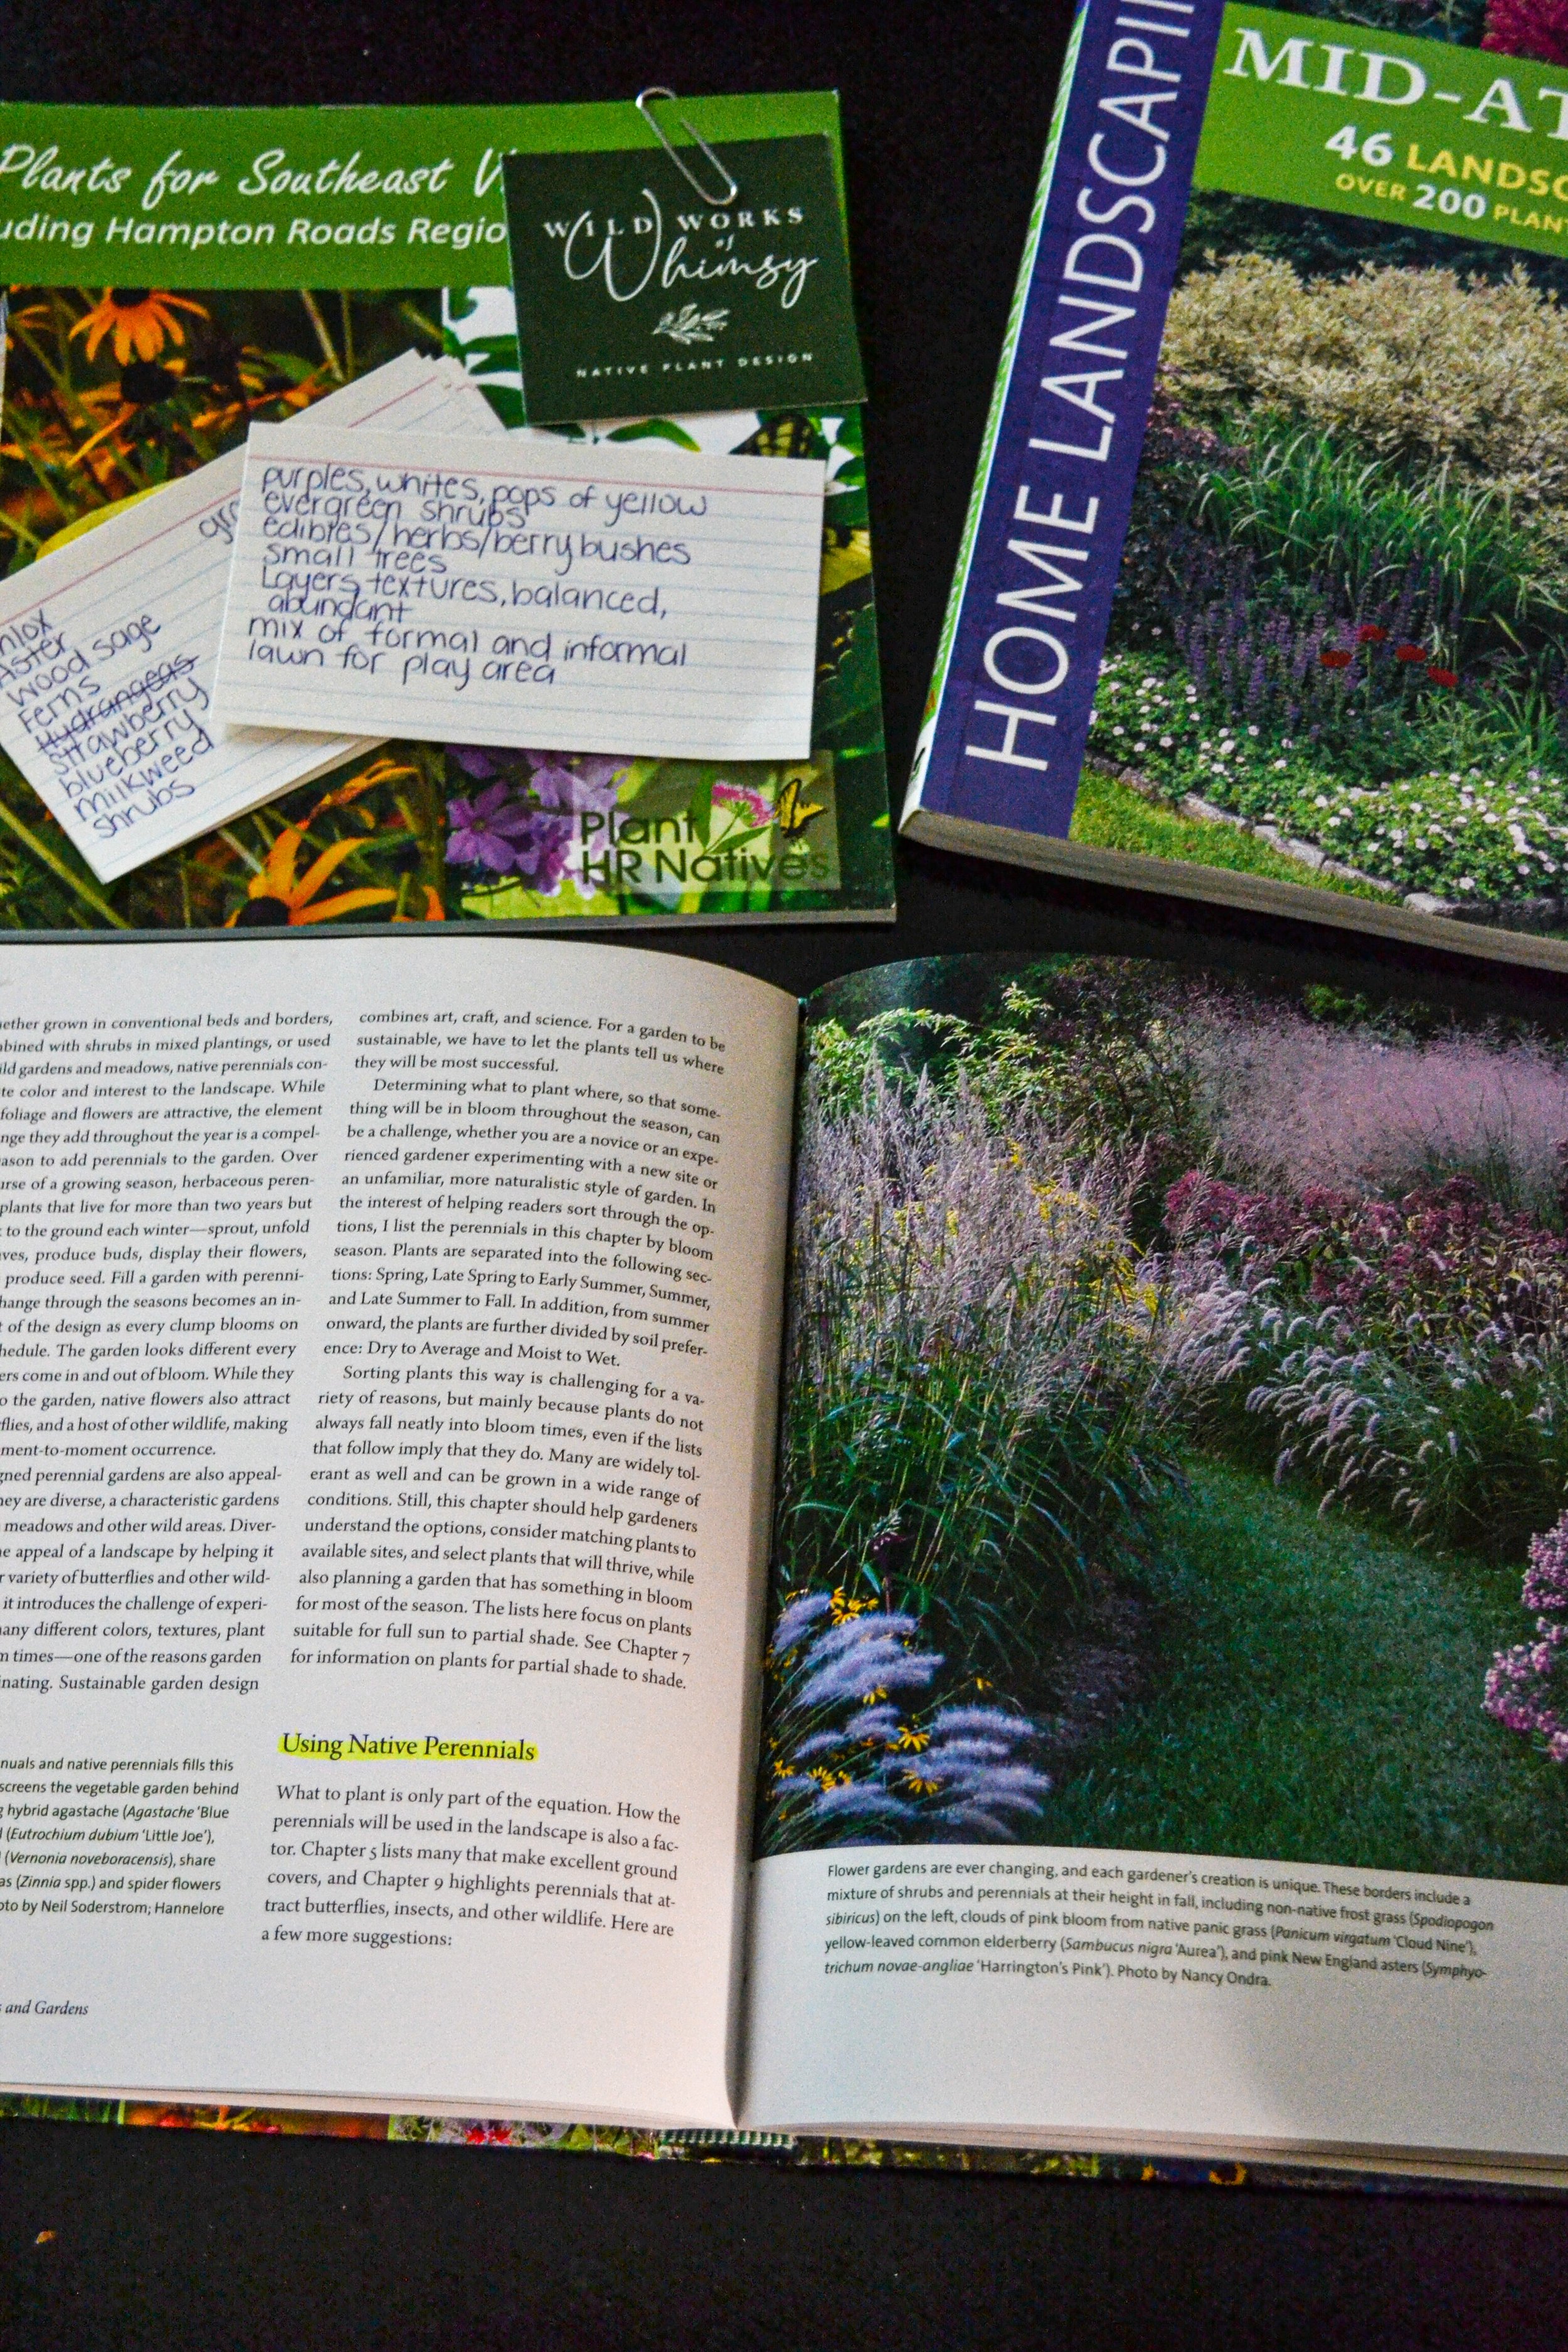
A conservation landscape can also be known as a green, eco-friendly, natural, earth-friendly or sustainable garden. There’s a lot of resources available about the benefits of a green garden and how to get started, but here are some key and helpful steps I’ve learned. The Chesapeake Gardening & Landscaping - The Essential Green Guide has been a huge source of information and the majority of these steps come from this title:
Reduce Lawn - A well-maintained, conventional lawn requires regular mowing, watering, fertilizing, and weed control using chemicals (in some cases). A conventional lawn is not as effective at absorbing water runoff, nor does it provide food or shelter for wildlife. The first step to creating a greener landscape is to reduce your lawn by adding in a mix of native ground covers, perennials, grasses, shrubs and trees. By replacing your lawn with native plants, you’re helping to reduce runoff, hydrocarbon use, and the use of chemicals that are released into the environment.
Build Plant Diversity - Local wildlife prefers a rich and diverse landscape that includes a variety of native trees, shrubs, and perennials. The first step toward building plant diversity involves removing invasive and non-native plants and replacing them with 3-4 different species of native plants.
Grow Native Plants - Growing plants that are indigenous is important to the environment, plus they’re already naturally adapted to our region, our soil, climate and growing conditions. They are generally much less dependent on needing additional watering, fertilizing, and overall maintenance, and they play a major role in providing nutrients to native insects that are essential to the food chain. Admittedly, I don’t like bugs, more specifically, spiders. I know they play an important role in the circle of (bug) life and that I’m creating an ideal environment for them to thrive, but I’m hoping that they’ll want to stay outside rather than finding their way inside. Pray for me y’all.
Manage Water Run Off - Directing water away from our homes and landscapes after a rainstorm is considered standard landscape practice, but the water runoff is traveling quickly to storm sewers, streams and ultimately rivers and bays (depending on where you live). The faster the water moves, the more erosion it causes, and less opportunity it has to absorb into the soil and eliminate pollutants. Installing a rain barrel or creating a rain garden are excellent solutions for managing water runoff. We’re still torn on if we want to install a rain barrel or not, so I probably won’t get into much detail about that here until we make a decision.
Welcome Wildlife - Create a garden that provides creatures with the resources they need to thrive. In many instances, habitats are lost due to new developments and are replaced with non-native plants and lawns. The idea is to add resources that are essential to wildlife, and provide them with food, water, shelter and nesting sites and materials. A wildlife friendly landscape can include planting native shrubs that produce berries for birds, or planting native flowers that encourage pollinators and butterflies.
Think progress, not perfection - This section in the book resonated with me so much! I think it’s incredibly important to remember that creating a sustainable gardening is a process, not a destination. Set goals, then focus on creating manageable steps without overwhelming yourself.

Photo: Wild Works of Whimsy, LLC
Why A Conservation Landscape?
In the past, I’ve made the mistake of buying plants solely on their looks. If I thought it was pretty then I bought it (R.I.P to all the lavender I’ve killed). I would put plants in the ground without any thought or consideration for what the plant needs or how the plant is giving back to the what the environment may need from it.
I ended up spending a lot of time and a lot of money to create what Josh dubbed: The Plant Graveyard. Everything died, and regardless of the amount of watering, fertilizing, and weed control I did, I couldn’t keep plants alive. When we bought our new house, I knew that I wanted the landscaping to be one our first big projects for us, and I knew that I wanted to invest in getting it right. Curb appeal is something that we missed out on at our old house and this time around, I wanted to tackle the landscaping first so we could enjoy the fruits of our labor sooner rather than later. So why a conservation landscape? While researching landscaping, I came across an article about the advantages of using native (indigenous) plants in your garden, and it took me down a rabbit hole where I started learning about conservation landscaping, permeable pavers, storm water management, plant diversity, welcoming wildlife and more. A conservation landscape would provide me with low(er) maintenance, sustainability, growth, and beauty, while in turn, I would be creating a space that gives back to our local wildlife, provide oxygen for the ecosystem, and can help improve the overall air and water quality for our community. When you think about it, the plants that are native to your area have already adapted to the environment it’s in. They’ve adapted to the local climate, the soil, and in most cases are even immune to the pests that may cause them harm. They’re self-sufficient and can survive without needing much from human interaction, so incorporating Virginia natives feels like the best choice for my family, and our environment.
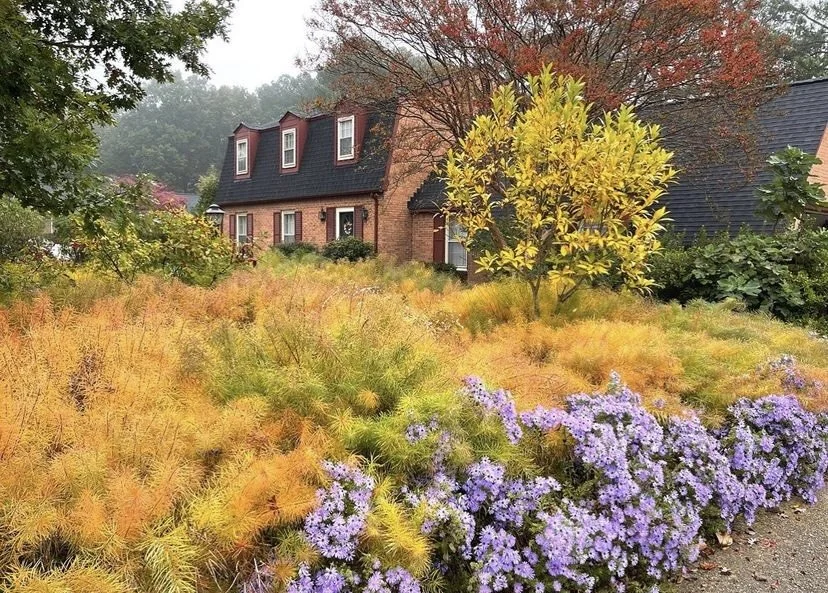
Photo: Wild Works of Whimsy, LLC
Working With A Certified Horticulturist
Investing in our landscaping was important for me, and I knew that I wanted to work with a professional who had a strong background on Virginia native plants and sustainable gardening. I also wanted to take the guesswork out of trying to determine if a plant is invasive or native to our region. I’m super excited to be working with Trista from Wild Works of Whimsy. She is a Virginia Certified Horticulturist, Designer, and Level 2 Chesapeake Bay Landscape Professional in design and installation, and she is incredibly knowledgeable and patient with us as we work through a design plan for our yard. We’ve already had both a phone consultation and in-person consultation with her to walk through our yard, discuss our goals, discuss VA native plants and the benefits of a green garden, as well as potential layout ideas. For our in-person consultation we spent an hour outside discussing plants, wildlife, soil, weed barrier, edging, rain barrels, managing water runoff, and minimizing our lawn. We even discussed incorporating edibles within the layout, because I love the idea of having strawberry and blueberry bushes, garlic and onions, and even variations of lettuce or kale growing among our future evergreen shrubs.
Trista has a wealth of knowledge, so we’ll be heavily leaning on her for the design, plant list, and resources, but we’ll be responsible for the landscaping and getting the actual plants in the ground.
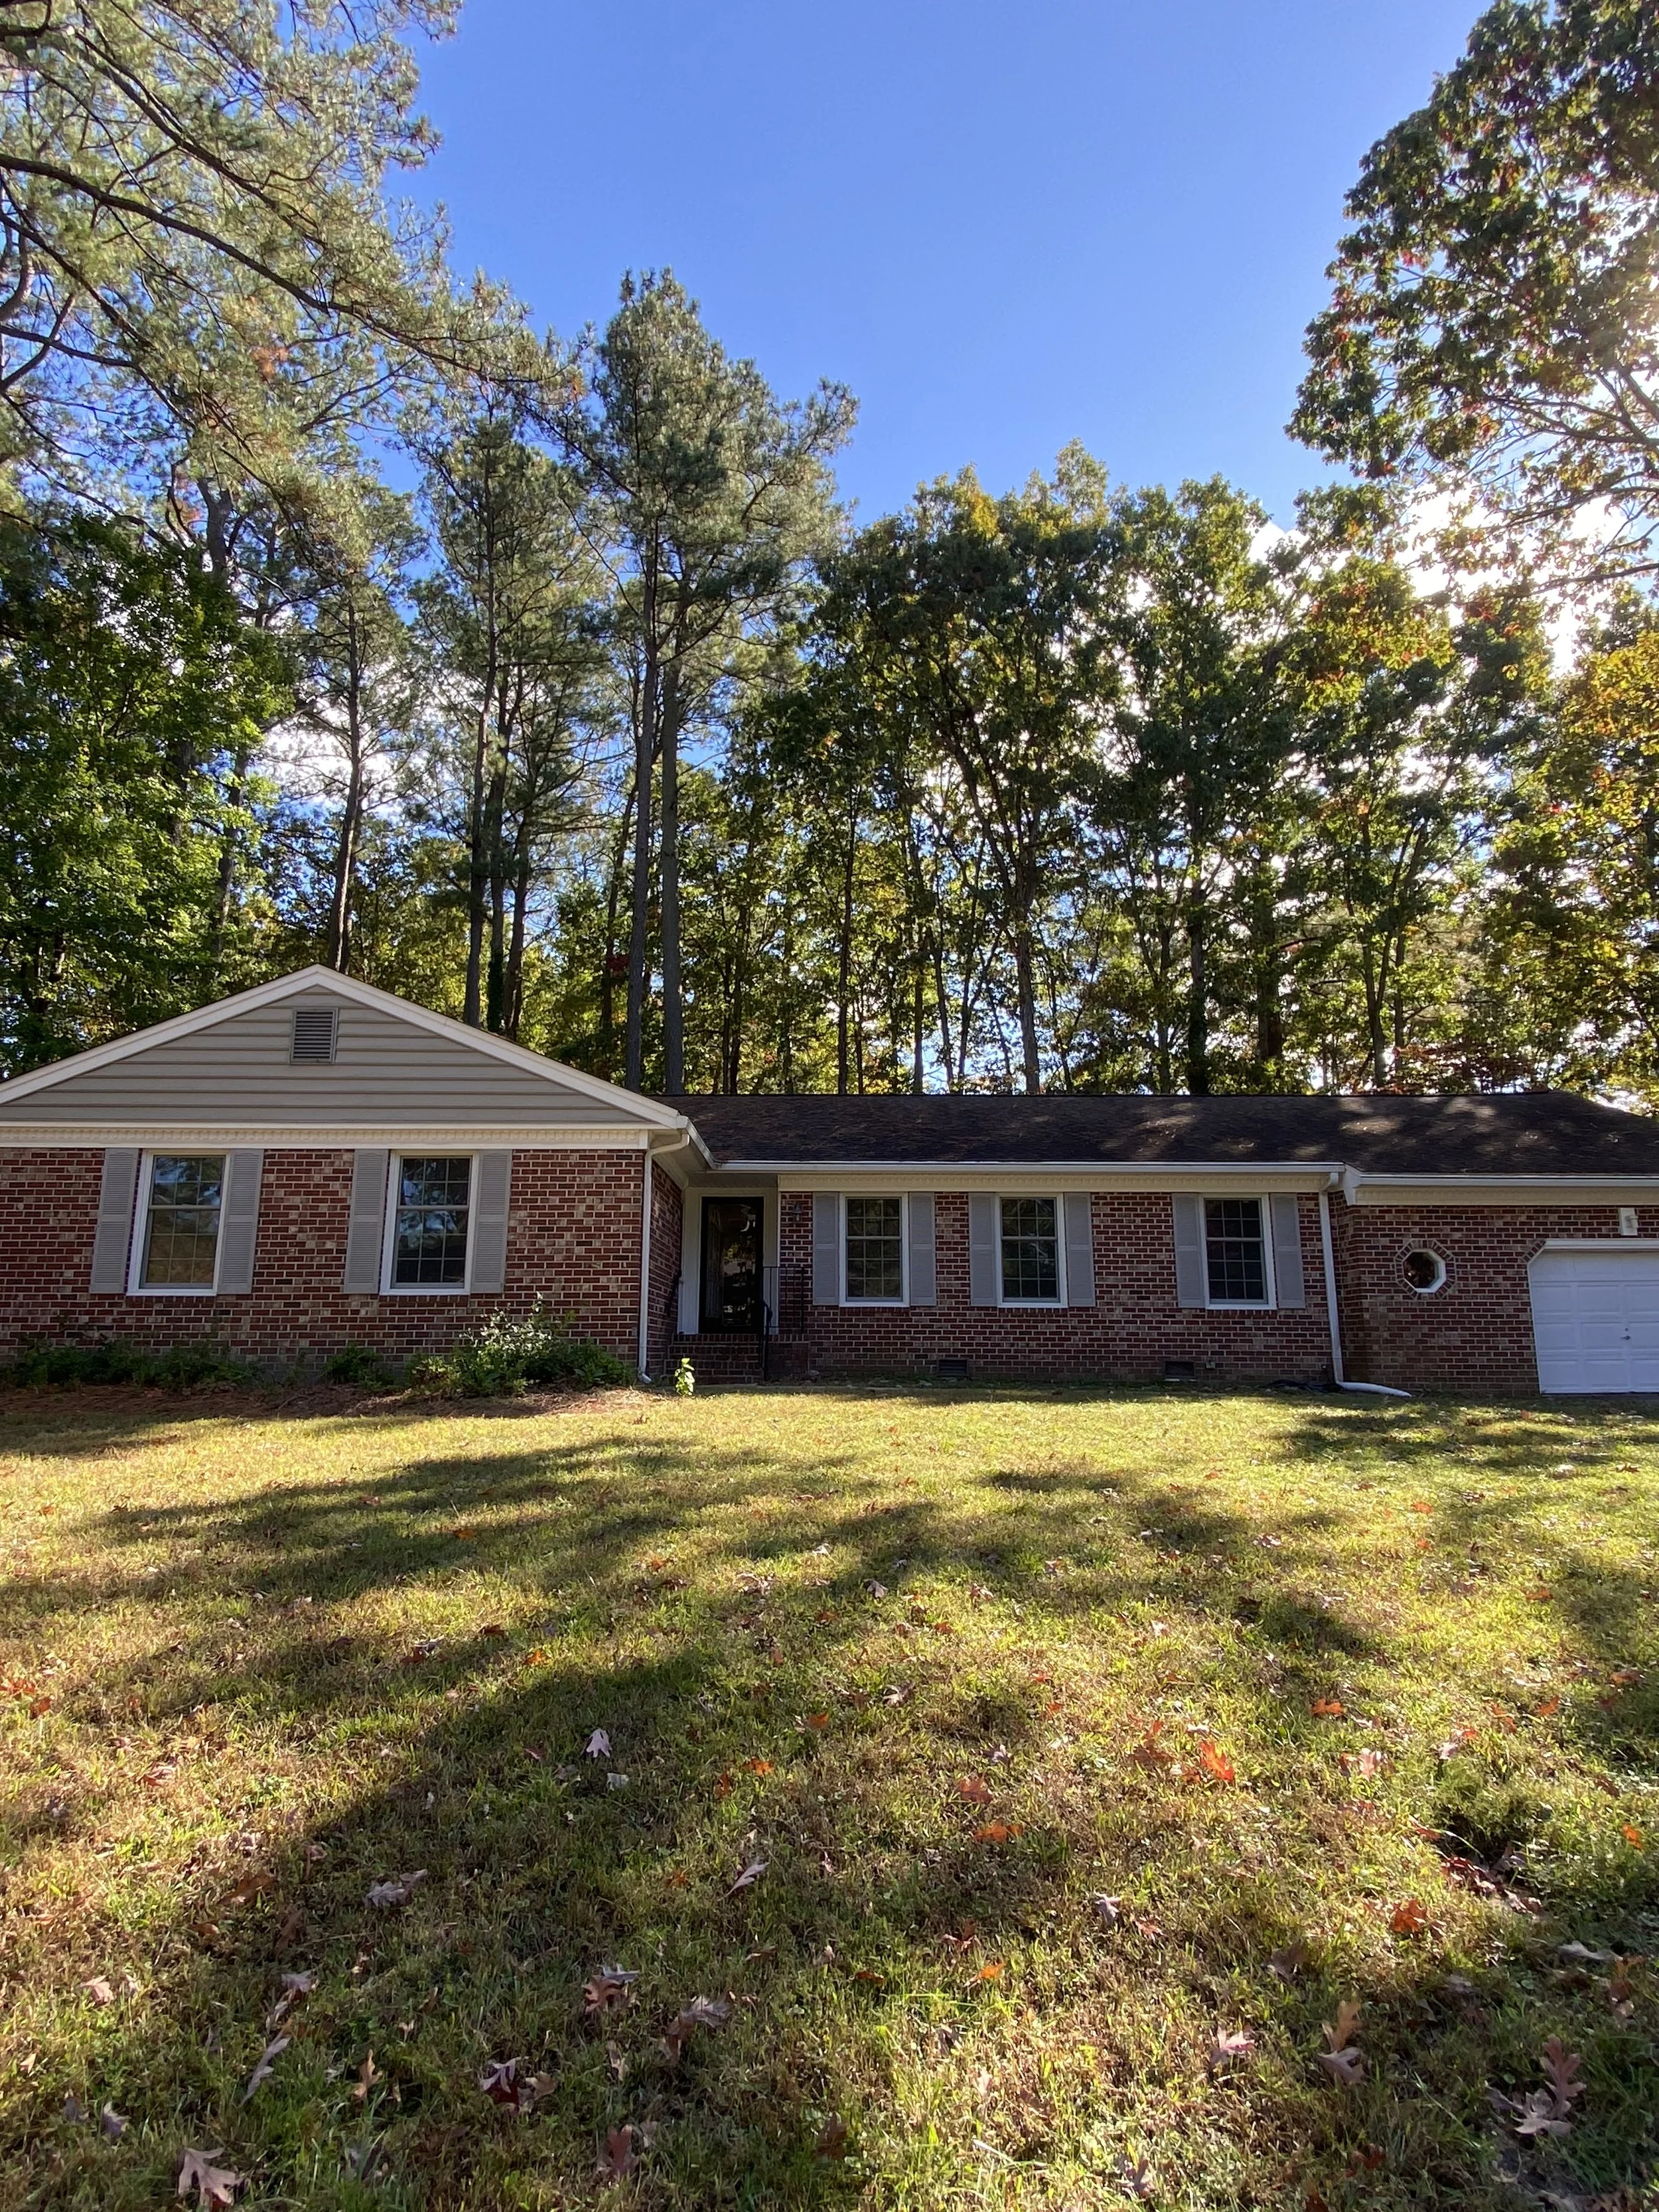
A Blank Slate - Our Front yard
Setting Manageable Goals
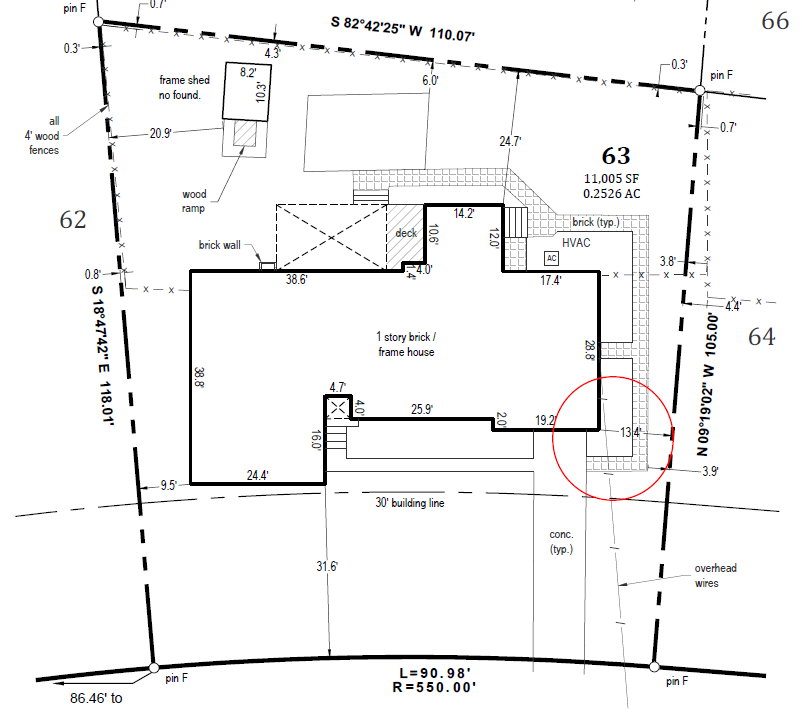
We’ve decided to break down the design of the front yard into three phases, so that we don’t overwhelm ourselves (remember point #6 from above), but also it’ll help with managing costs. Here is the breakdown of the three phases:
Phase I - Garden Beds: These are the two areas along the foundation, entry walkway and left side of our home. It covers about 500 sq. ft. and was once filled with struggling non-native azalea bushes that we removed and are still removing. It’s a complete blank slate and Trista is working on a photo mockup and scaled drawing of the space to capture what we discussed during our consultations. I shared with her my color story (greens, purples, pops of yellows, and white) and that I’d like to create a textured garden with lush layers, height variations, and long bloom seasons. Something that feels relaxed (between formal and informal), but also feels like an intentional design. Phase I will happen this Fall, and we should have the mockups next week, which I’ll share in a separate post later.
Phase II - Full Yard Design: We’re on a waitlist for the full yard design, so planting for Phase II won’t happen until next Spring or maybe even next Fall (which is the ideal time to get new plants in the ground). The timeline works for us because we know maintaining our garden is going to be a lot of work, especially during the first season when our plants are trying to get established, and weeds will be trying to take over. We want to minimize maintenance by creating garden zones during the different seasons, so that as the plants get more acclimated in one zone, the maintenance level will decrease significantly. For the first season, we can focus on weeding and growing the plants we’re planting in Phase I and then by time we get to Phase II, the plants from Phase I shouldn’t need much maintenance.
Phase III - Driveway Extension: The space to the right of our garage (marked red circle below) is where we plan to replace the brick walkway and extend our driveway. We have some issues with standing water in this area, so we’ve been researching and considering a driveway built using permeable brick pavers. Permeable pavers have joints that are much wider than traditional pavers and allow rainwater to easily drain through the cracks and soak into the soil. With impermeable driveways, rainwater that falls off our roofs, run down and fill rivers, ponds, and municipal water systems. Whereas, permeable pavers give the water back to the soil and minimize the amount of rainwater rushing to the gutters. We’re still getting quotes and seeing if financially a permeable driveway is a good fit, but extending the driveway will most likely be the last step to our front yard remodel.
As you can see, building our dream garden won’t be just a one and done occasion. We’ll be working on this space over the next year or so, and I can’t wait to see our yard filled with Virginia native perennials, grasses, shrubs and trees! Next week I plan on discussing our design inspo. and sharing the mockups and plant list for the Phase I garden beds. If you have any conservation landscape questions let me know, and I can try to answer here or point you in the right direction.
Helpful Resources


